Coilover Conversion
 |
Following the leads of IMON members Brad Anesi and Grayson, I decided to do a coilover suspension change to my Merkur. I had a set of 10 year old Koni struts up front that still seemed fine, but the stock ride height springs I bought from Rapido, no longer were stock ride height. On the new car, I was going to be fitting some larger tires and 16" wheels, so a little extra clearance would be nice. I also have a STEEP driveway, and the ability to adjust my ride height is important. I do not wan't to lower the car, if anything, I will raise it slightly as required. |
|||
 |
||||
 |
||||

After the coil is taken off, you will need to cut the spring perch loose from the spring. I had access to a lathe, but it turned out to be easier (more control) to cut it using a hack saw. The two old cuts in the spring perch were done by me 10 years ago to help get more wheel clearance. We cut nearly all the way thru the spring perch where it attaches to the strut, literally milimeters above the weld. Leave the weld, as this will support the new coilover perch.

After cutting most of the way thru the sheet metal of the lower perch, being careful to not cut the strut tube itself, we used a hammer to bang the backside and shear the remaining metal loose.

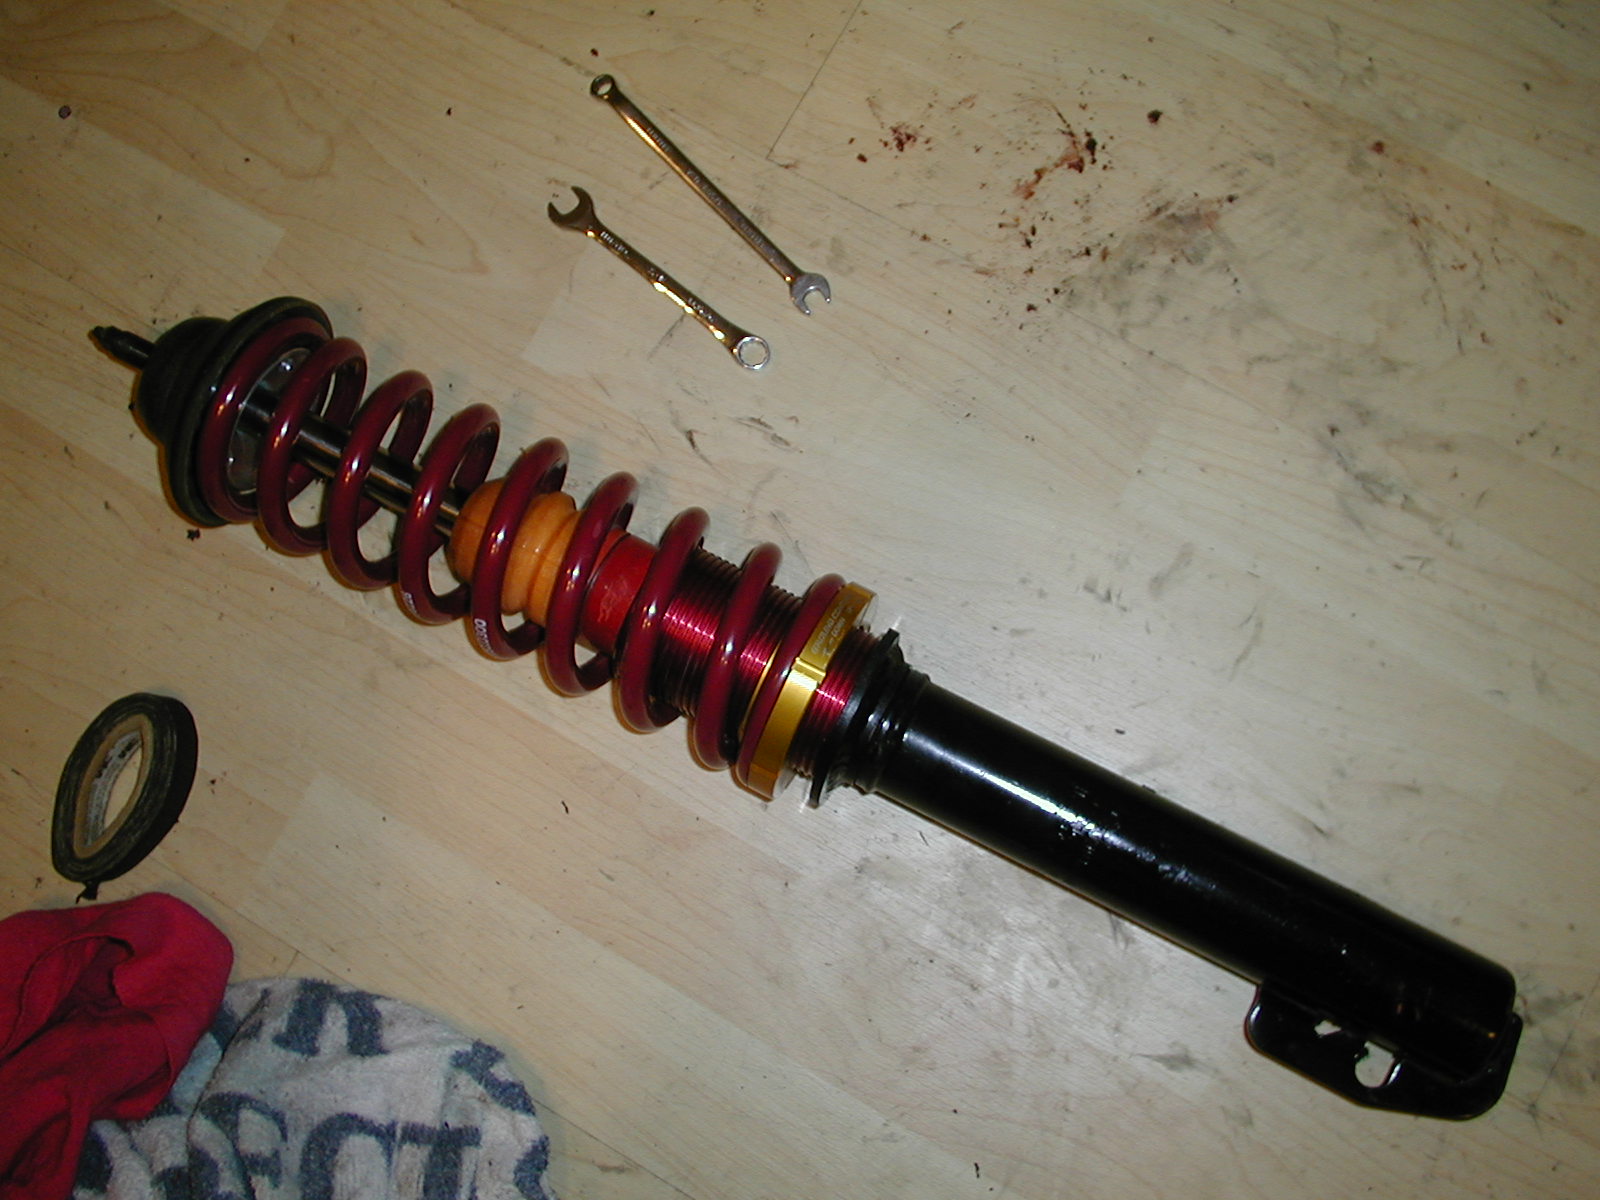
After cleaning everything and regreasing the top strut bearing, I reassembled the pieces. I painted the strut tube black. You reuse some of the XR strut hardware, but you use a new spring. The springs that come in the kit are Eibach brand coilover springs. They are a standard 2.5" I.D. and any brand spring could be put in its place. It is no longer Merkur specific. I chose a 10" free length, progressive spring made by QA1 and available thru JEGS. It's springrate varies between 140 lb/in and 250 lbs. I found that the 300 lb./in. spring was way too stiff for my tastes.
I ordered new bumps stops (the yellow rubberish pieces.) My old ones had really disintegrated. They were $12 each. Their function is to soften any impact from bottoming out the suspension, providing a cushion instead of binding the coil. The threaded aluminum tube fits snugly over the strut tube. You can see in the this photo the smaller size of the coilover spring coil and the amount of wheel clearance that I should gain.

Here is the finished product. Total cost = $232 including the springs.


Please enjoy your
visit to merkurXR4TI.com
Thank you,
Richard Thompson